Chimney Flashing – Inspection Guide
At the chimney, there are essentially five types of flashing that we inspect. They include:
- step flashing;
- counter-flashing;
- apron flashing;
- cricket flashing; and
- backer flashing.
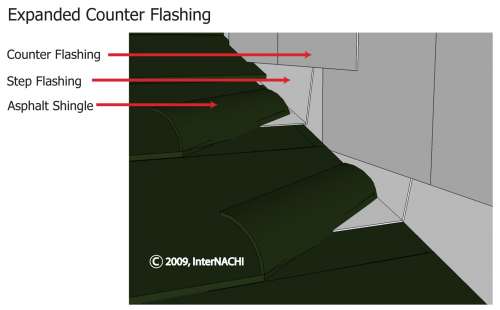
Step flashing is installed where the roof intersects a vertical sidewall. The step flashings are the small individual pieces of metal installed with each shingle course. They “step” with each course.
Counter-flashing is flashing material that covers and protects the top edges of all the other types of flashing to prevent water intrusion.
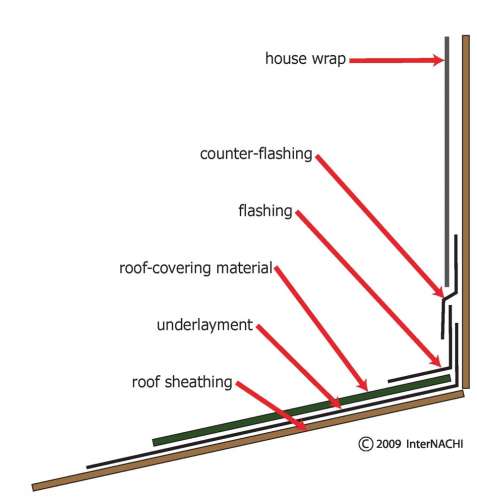
Apron flashing is installed where a roof intersects a headwall. Common locations for an apron flashing are at the front side (or downslope side) of a dormer, at a chimney, and anywhere there’s a transition between a horizontal and a vertical surface.
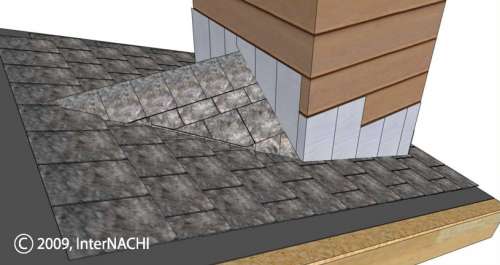
Cricket flashing is installed where the roof intersects a chimney or a curbed roof penetration. The cricket diverts water around, while the backer flashing provides a weatherproofing transition material right where the backside of some type of penetration intersects the roof. A recommended best practice is to install a cricket when a chimneystack is more than 30 inches wide (the NRCA recommends 24 inches wide).
Backer flashing is installed when a chimney that is not very wide (only 20 inches) intersects a roof, and there’s no requirement for a cricket. A backer flashing would be installed on the upslope backside of that stack.
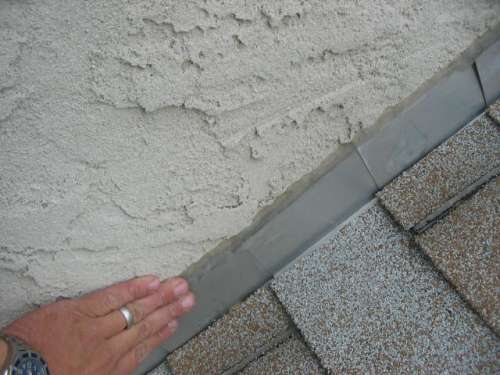
Missing counter-flashing at this chimney stack sidewall. The step flashing is installed. Because the counter flashing is missing, the top edge of the step flashing is prone to water penetration. It has been sealed with some sealant, but that is not a standard installation practice. Defect.
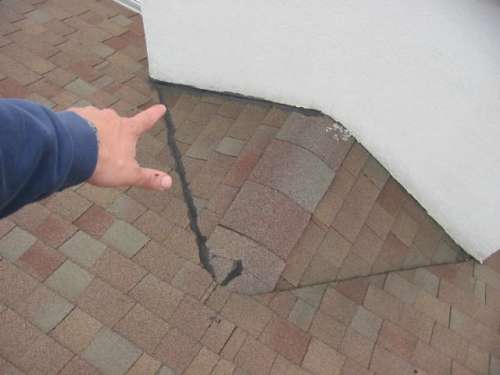
This is a cricket installed on the backside of a masonry chimney stack covered with a stucco exterior covering. The valley on the left side of the cricket has been sealed up with black roofing sealant. This is an indication of a water intrusion problem. The sealant is not permanent. Poor practice. Defect.
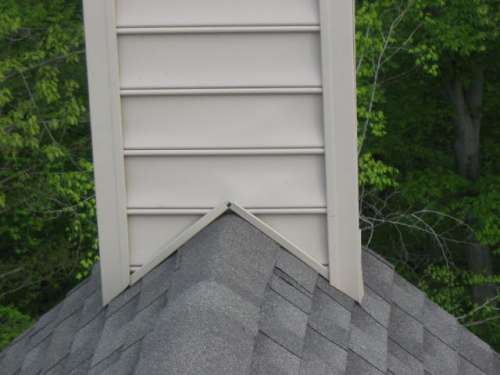
This is a chimney stack on a ridge area, and the flashing materials are not readily visible.
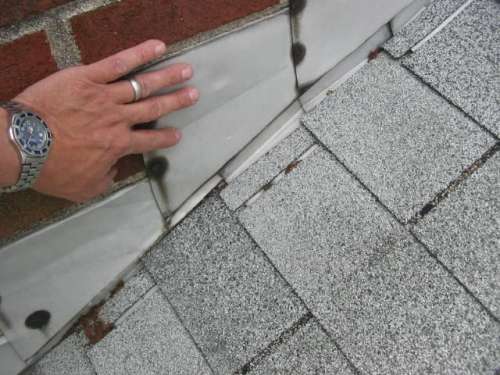
This flashing was installed at the masonry chimney stack. The counter-flashing is installed with about 1 inch of the flashing material inserted into the masonry joint. This is good installation practice.
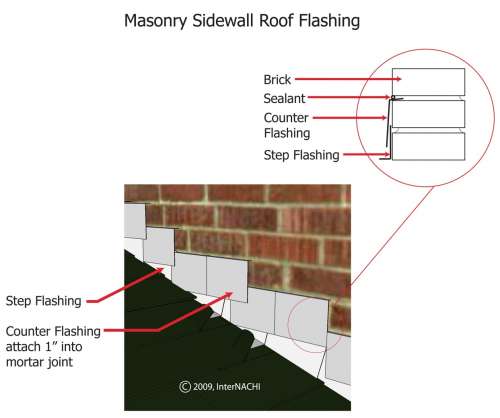
The best practice is to install the top edge of the counter-flashing at a masonry chimney by inserting at least 1 inch of the flashing materials into the masonry. For a brick chimney stack, this insertion would be at the mortar joint. Some installers will cut a groove in the masonry for the flashing insertion.
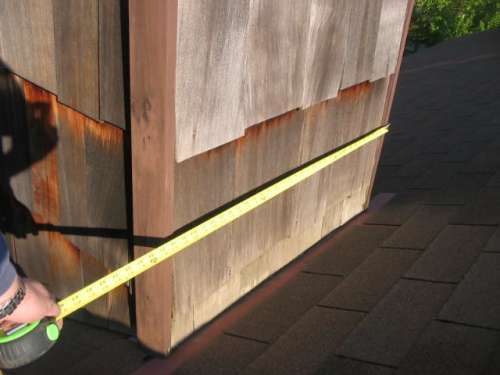
Missing cricket flashing. This chimney, covered with wood siding, is almost 4 feet wide. Back flashing is installed. But the missing cricket makes this a defect.
